A DIY Journey
If you’re like me and love crafting, upcycling, and finding new ways to make something beautiful out of what you already have, then this DIY project is perfect for you! Recently, I decided to try my hand at jewelry making, and I couldn’t be more excited to share my experience with you.
It all started when I bought a jewelry-making kit and a necklace chain set from Amazon (I’ll include the link to the one I used). These kits are great for beginners and come with all the essential tools you need. While sorting through my supplies, I remembered some crystal-like beads from an old light fixture in my previous house. I didn’t care for the look of the fixture at the time, but I couldn’t bring myself to toss those cute little beads—they had potential. So, I kept them, and boy, am I glad I did!
Jewelry-making kit
Necklace chain set
Turning Old Beads into New Treasures
With my kit in hand and those crystal beads begging for new life, I got to work. Here’s how I turned them into adorable earring and necklace sets that I now have ready to sell!
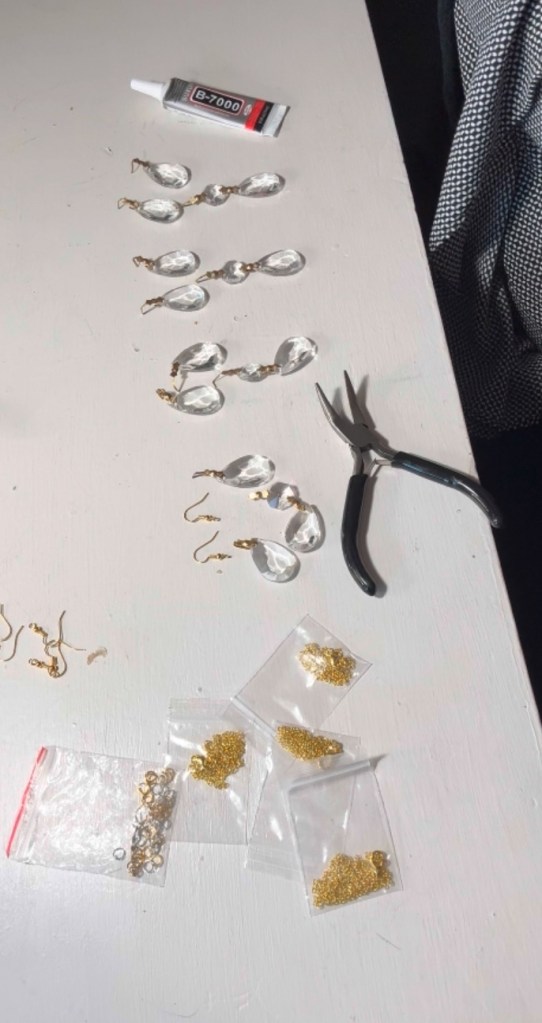
Materials:
- Jewelry-making kit https://amzn.to/3Bgn4Ww
- Cheap necklace chain set https://amzn.to/3TKQZMU
- Upcycled beads (like mine from an old light fixture)
- Basic jewelry findings (hooks, jump rings, clasps)
Step 1: Take Apart the Light Fixture Beads
First, I carefully disassembled the beads from the light fixture. These beads were beautiful on their own but definitely needed some cleaning up. A quick rinse in warm soapy water did the trick, and once dried, they were sparkling like new!
Step 2: Plan Your Designs
I decided to keep things simple and chic. The beads were already an elegant statement, so I wanted the rest of the design to be minimal. I laid out enough beads to create four matching sets of earrings and necklaces, which felt like the perfect amount to sell.
Step 3: Assemble the Jewelry
Using the jewelry-making kit, I started by attaching the beads to the necklace chains. With a few simple steps (opening and closing jump rings and using pliers to secure clasps), I had my necklaces done in no time. Then I moved on to the earrings. If you’re new to this, don’t worry! These basic jewelry techniques are easy to pick up, and once you get going, you’ll be surprised at how fast you can work.
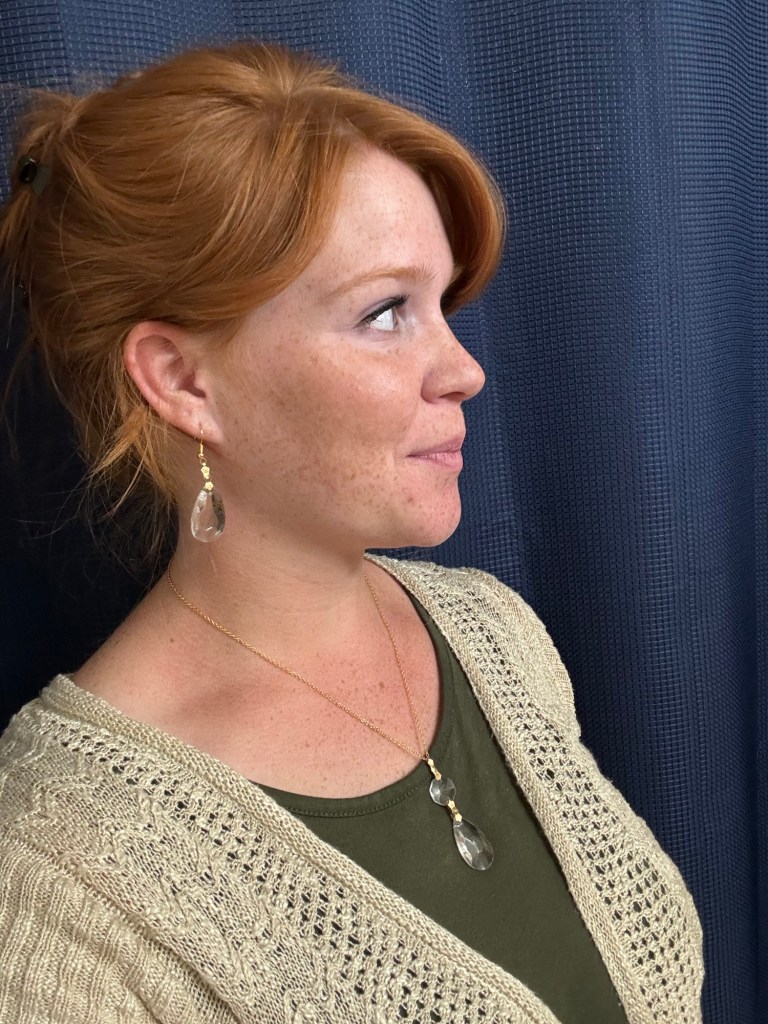
Step 4: Admire Your Work
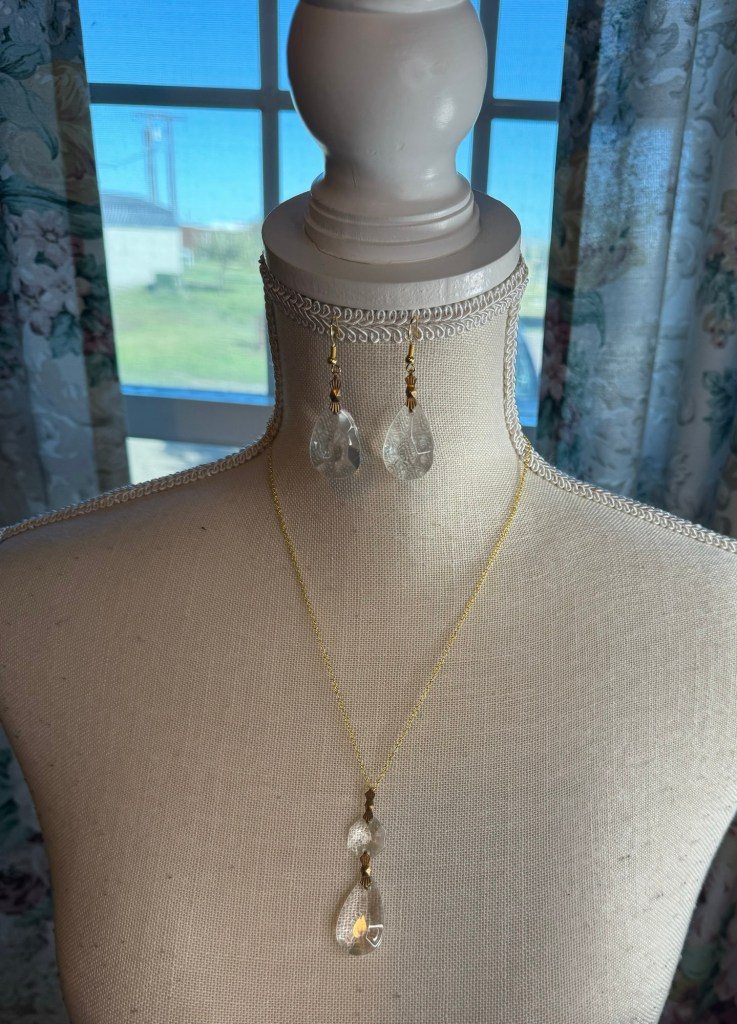
In the end, I had four matching sets of crystal earrings and necklaces that were absolutely adorable! They were simple yet elegant, and I could already imagine them being a perfect fit for someone’s wardrobe.
Selling Your Jewelry
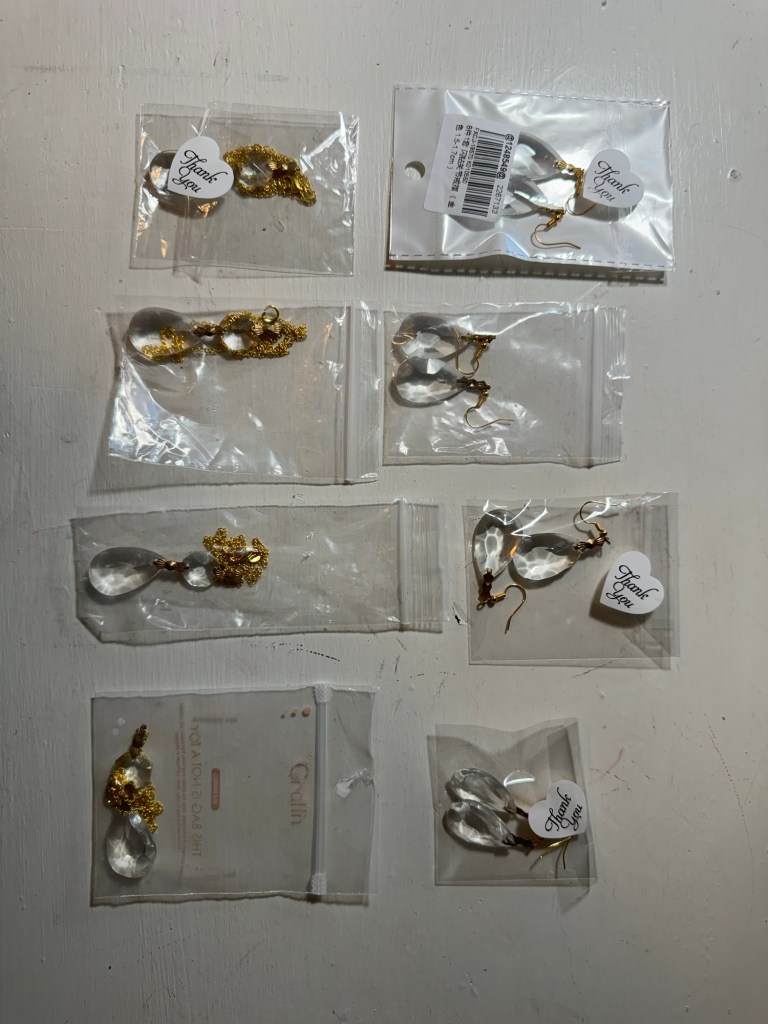
Now that I have these four sets ready, I’m listing them on some of my favorite selling apps, including eBay, Mercari, and Poshmark. These platforms are excellent for getting your handmade creations in front of potential buyers. Since I already use these apps to sell other items, adding my handmade jewelry to the mix feels like a natural next step.
Why Upcycle for Jewelry?
There’s something so satisfying about turning something old into something new. By upcycling, you’re not only saving money on materials, but you’re also creating one-of-a-kind pieces that can’t be found anywhere else. Plus, people love unique, handcrafted jewelry, and when they hear it was made from upcycled materials, it often adds an extra level of charm!
So, if you’ve got some old beads lying around or any materials you’re not quite sure what to do with, why not give jewelry making a try? With a simple kit and a little creativity, you can turn just about anything into beautiful, wearable art.
I hope you feel inspired to start your own jewelry-making journey, whether it’s for fun or for selling like me. Keep an eye on my shops for the new sets I made—they’ll be available soon on eBay, Mercari, and Poshmark!
Happy crafting!
