Creative Paper Quilling: Transforming Scrap Wood into Art
Building a house is a journey filled with creativity, from choosing layouts to selecting finishes. For my husband and me, this process sparked an unexpected passion project: turning leftover construction materials into beautiful art pieces using paper quilling. It’s amazing how something as utilitarian as scrap wood can become a canvas for delicate, intricate designs.
The Inspiration: Scrap I-Joists Turned Art Canvas
As we worked on our house, we found ourselves with several small, rectangular pieces of I-joist. At first glance, these rough pieces seemed destined for the trash. But as a crafter, I saw potential. The uneven texture of the wood offered a unique, rustic background for paper quilling—a craft where smooth surfaces aren’t always necessary.
Step 1: Preparing the Wood
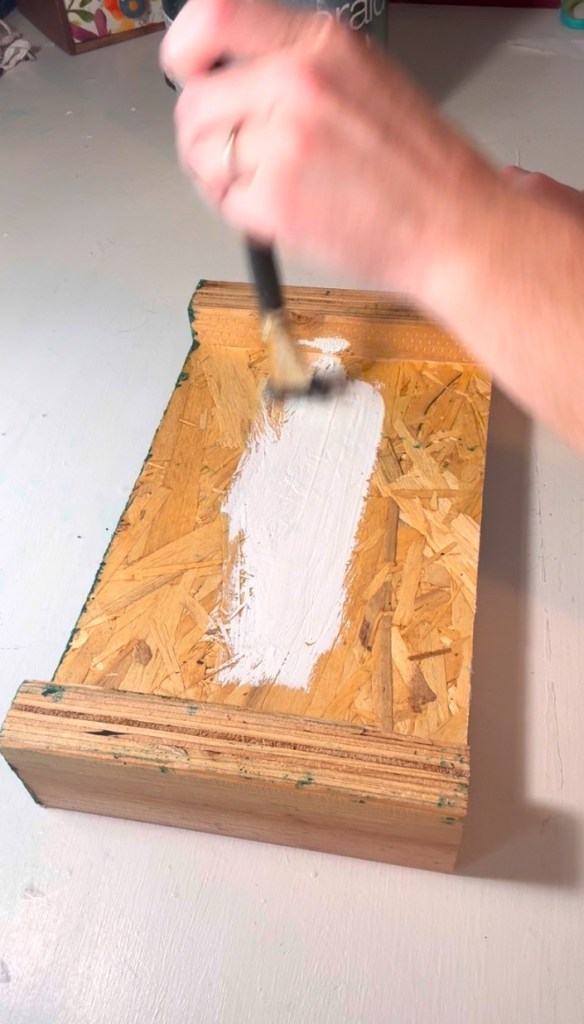
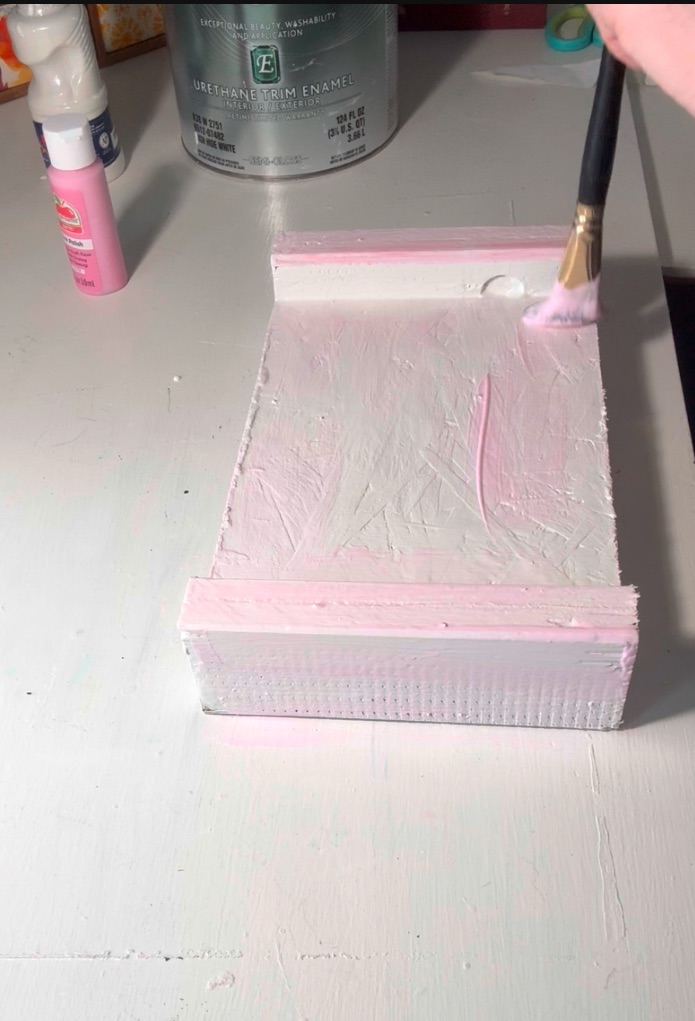
To transform the rough scrap into an art-worthy surface, I first primed it with a basic primer to seal the wood and create a base layer. After the primer dried, I painted it a soft, light pink to set a delicate, feminine tone. This muted background provided the perfect contrast for the white and pink paper quilling I envisioned.
Step 2: Creating the Focal Point

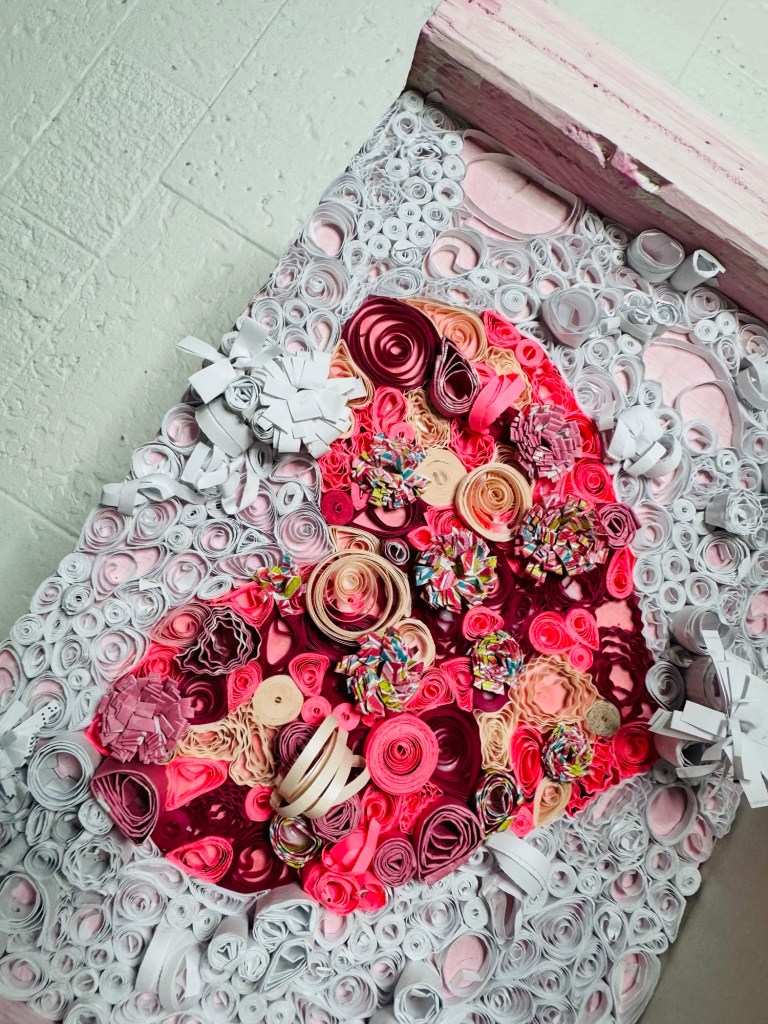
In the center of the painted wood, I glued a paper heart cut from pink paper. This heart served as the focal point of the piece and inspired the rest of the design.
Step 3: Quilling with White and Pink Paper
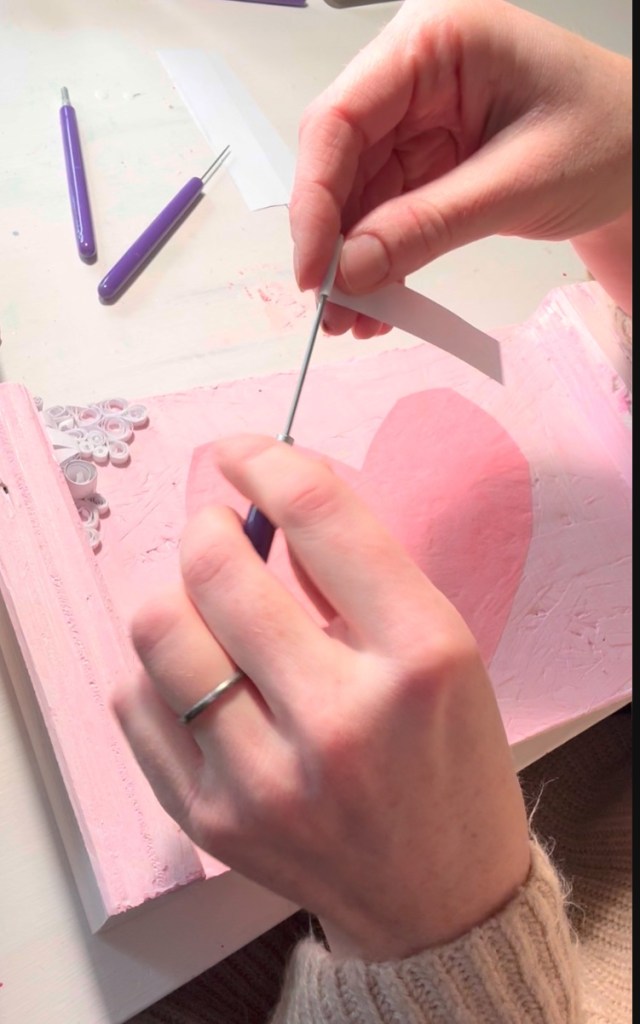
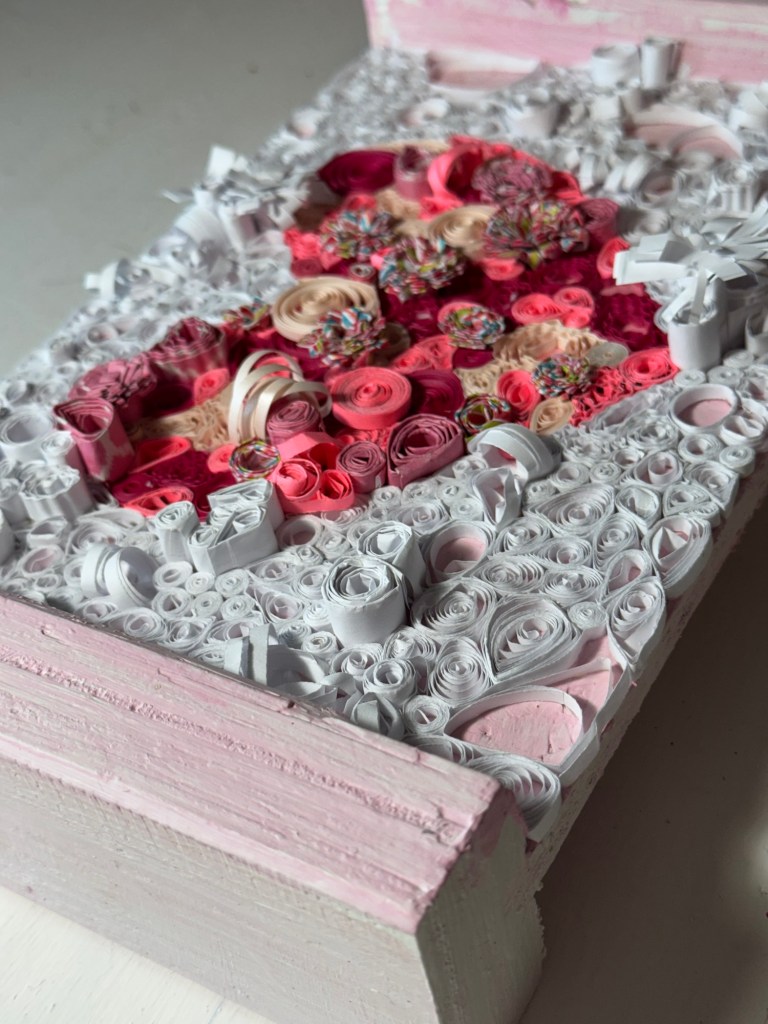
With the base prepared, I began the fun part: quilling! Using strips of paper in white, I created an assortment of shapes—tight coils, teardrops, and scrolls—to form intricate patterns around the heart.
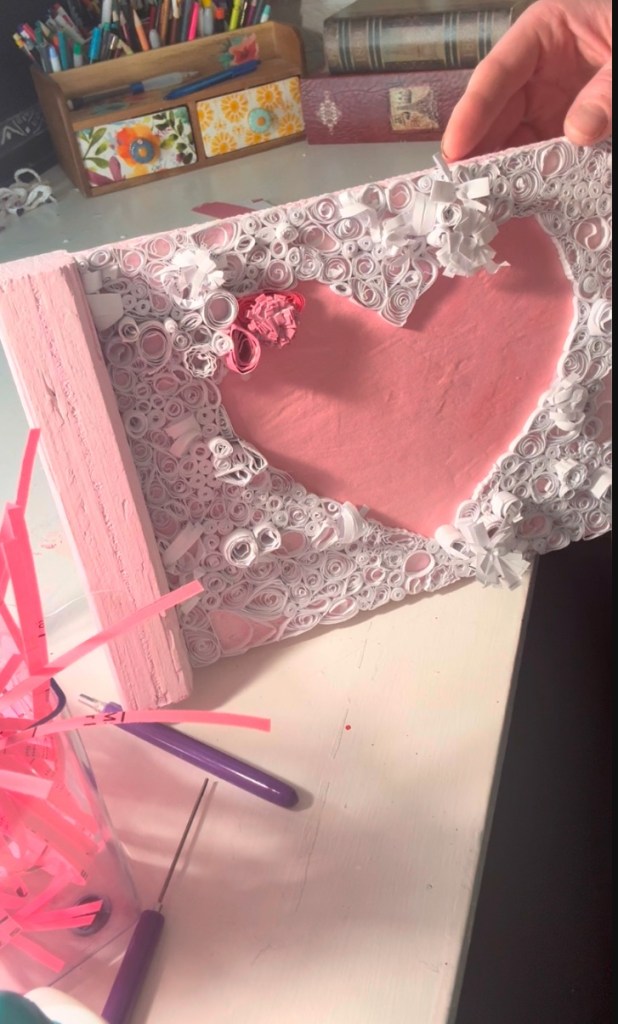
The white paper quilling added contrast and dimension, while the different shades of pink complemented the heart in the center. The combination of colors and textures brought the piece to life, giving it a whimsical yet elegant feel.
Why Paper Quilling Works on Rough Surfaces
One of the most exciting discoveries was how well paper quilling adhered to the slightly rough surface of the I-joist. The texture added a subtle, rustic charm that you wouldn’t get with a smoother background. Plus, the sturdiness of the wood ensured that the piece felt substantial and durable.
The Result: Junk Wood to Unique Decor
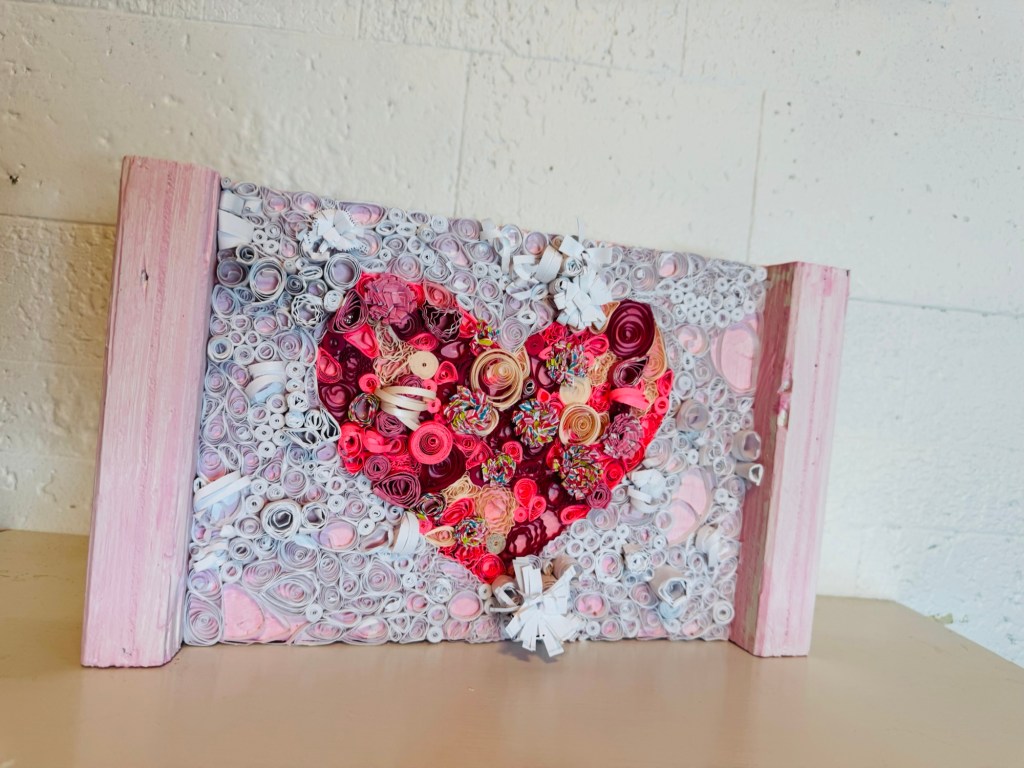
The finished piece is more than just a decorative item; it’s a meaningful reminder of this chapter in our lives. Every time I look at it, I’m reminded of the creativity that can emerge when you see potential in the unexpected.
Why You Should Try This
If you have leftover wood or other scrap materials from a project, don’t toss them out! With a little imagination, you can turn them into beautiful, functional art. Paper quilling is a forgiving and versatile craft that works wonderfully on unconventional surfaces.
Tips for Success
• Seal the Surface: Always prime and paint the wood to ensure the paper quilling adheres properly.
• Choose Contrasting Colors: Pick a background color that makes your quilling shapes pop.
• Experiment with Shapes: Mix simple and intricate quilling patterns for added interest.
• Make It Personal: Incorporate designs that resonate with you, like hearts, flowers, or initials.
Creating art from scrap wood is not only a sustainable way to use leftover materials but also a rewarding way to infuse your home with personalized decor. For us, it was a wonderful way to combine practicality and creativity during the exciting process of building our dream home.
Have you ever turned construction leftovers into something beautiful? I’d love to hear your stories!
—Chandee
